
Free Reference Photos for Artist
- Karen Hanna
- Feb 23, 2025
- 9 min read
Updated: Feb 23, 2025
Why not take your own reference photos
I would love to be a plein air painter (the practice of painting outdoors), but at my age, it's not something I aspire to. However, I do enjoy setting up to paint in my backyard occasionally. I primarily use reference photos, which I obtain from a couple of free reference photo pages on Facebook, and I also draw from my own imagination. Over the past year, I've started using my own photos taken during my morning walks specifically to use as reference photos. I've found myself taking more and more photos of things I wouldn't have considered before. I love photographing trees, flowers, and branches, then adding my imagination to create drawings for my paintings. I began this approach because several instructors in one of my favorite painting groups discussed how to use and edit your own photos for painting. The advantage of using your own photos is that you don't have to worry about copyright issues and can create a series of paintings from a single reference photo or multiple photos, using the same subject or scene and editing the photo to suit your painting style.

By starting your painting with your own reference photos, you ensure that your artwork is genuinely unique and you have control over its composition. Creating your artwork always involves a certain degree of planning and exploration. Even if you're an intuitive painter, you still engage in planning by selecting the canvas size, tools, and color palette. By crafting your own composition, you can observe how lighting affects your focal point and identify the colors, since colors can appear flat in pictures. Over time, you can build your own reference library, providing endless inspiration. All you need is a walk around your neighborhood, a nature trip, or an outing where you can capture photos that interest you and reflect what you want to paint. You don't even need to leave your house. You can set up still life scenes or take photos of rooms, everyday objects, or your grandchildren. With cell phones, it's easy to get started.
Start with your cell phone camera
Regardless of whether you use an Android or an iPhone, the best approach is to familiarize yourself with all the features of your camera. If you're not aware of all the capabilities your phone's camera offers, I recommend searching online for how to use your phone's camera features. Look up "how to use the camera features of my Android or iPhone." Before you start taking photos, ensure you clean the lenses on your phone. Simple, right? Another tip to avoid blurry photos, besides cleaning the lenses, is to pay attention to how you hold your phone when capturing a photo. Hold your phone with both hands, keeping your elbows against your body. This stabilizes your phone and results in much better photos.
Tips for taking photos
Capture high-resolution photos. Every great photo has a focal point. If you're not well-versed in composition, begin by using the rule of thirds to achieve an effective visual layout. You can enable a grid on your phone's camera to assist while taking photos. This grid, along with a horizontal line, helps you compose your focal point and keep your phone level. Additionally, you can use your camera's autofocus as you familiarize yourself with all the features of your phone's camera. Consider whether the composition of your photo is something you'd like to draw or paint.
It's best to utilize natural lighting unless you have specialized photography lighting and the expertise to use it. Disable the auto flash on your camera. Using the flash can make the subject or scene appear flat and washed out. If you lack photography lighting and reflectors, take your photos in natural light in the morning, well before noon, or in the late afternoon when the sunlight is not at its harshest, ensuring the shadows and highlights are soft and non-distracting. The golden hours are the first hour after sunrise and the last hour before sunset. During these times, you can add dramatic flair to your images by positioning the object or scene with the sunrise or sunset directly behind it.
You will also need to consider the angle of your subject or scene so you know what angle works best for you when you're painting. Take lots of photos. The more photos you take the better the quality of your photos and you can develop the feel for what you like in the composition of your photo. Be sure to practice changing your viewpoint when taking your photo by standing, then crouching or lying down on the ground.
Capture images of subjects or scenes that resonate with you. Animals, flowers, water, faces, or buildings are excellent subjects for your art. Everyday mundane objects in your yard or home also work well. Consider the light streaming through a window or create a still life with flowers in a vase next to a stack of books on a table. If you find it difficult to leave your home, there is always something simple to begin with. Just start and let your intuition guide you in taking your photos.
The final point I'd like to address is that your photograph should narrate a story, evoke an emotion, or incorporate movement to create an engaging painting. For instance, capturing the joy on someone's face, the flow of water, or the drifting clouds in the sky. The ambiance of a sunrise, sunset, or an approaching storm over the water or in the sky can all convey a story or express an emotion.
One more step to great focal points
Before you can compose your painting your going to want to edit your photo. This can be as easy as just cropping the photo to better scale with the canvas you are using, leaving out an object that is distracting in the photo or adding something to the composition that will improve the composition of the painting. By making these changes to tweak your photo you can then move on to drawing or sketching you photo to your canvas. Now you can choose your color palette and you're ready to paint.
Your reference photos
I hope this will open up a new path for you to create and inspire your artwork. This will give you complete control over what you paint by starting with your own reference photo. It's an opportunity to plan your artwork and even create a series using just one photo. Van Gogh produced many paintings using the same scene in his work. This might help you discover the unique style you've been searching for, with inspiration at your fingertips from all the reference photos you can build upon. If you're new to using your own reference photos, make sure to establish a system for organizing them. This can be as simple as setting up photo albums in your phone's apps.
The benefits
There are several advantages to capturing your own reference photos. You likely always have your phone with you, regardless of your location. Whether you're on a daily walk, observing your dogs playing in the yard, or when your husband brings you flowers, there are countless opportunities to take reference photos. It's simply about developing the habit of taking them. Creating a painting from scratch is incredibly rewarding, especially when using and editing your own reference photos.
Remember, if this is new to you, it's important to take numerous photos for practice at various times of the day, in different lighting and weather conditions. You can begin by photographing the same object or scene in your backyard at different times, under varying lighting or weather, and from different angles to see what appeals to you. This will help you refine your photography skills. It will prepare you to focus on balance, harmony, and selecting a good focal point for your photo. Start with the rule of thirds and use the grid on your phone's camera to help you learn how to create the perfect focal point. Capture images at the highest resolution and make use of natural lighting. Consider the viewpoint by crouching or even standing on a ladder if possible. Finally, edit your photo to create the image you want to portray.
If this option doesn't interest you or if you're unable to go out and take photos, consider joining a Facebook group that offers free reference photos. Each group has its own rules for using their photos, so make sure to follow them. Two of my favorites are Free Reference Photos for the Artist and Free Reference Photos for Animal Artist. Now, get ready, aim, and click. You're on your way to obtaining free reference photos that are uniquely yours.
Freebie
No business forms this month just a sketch to have fun with. March is already on our doorstep so I bring you flowers to brighten your day. Reduce the size for your journal or trace it onto watercolor paper or a greeting card and don't be afraid to change it up. Have fun my friends.

Tips/Books
Let's discuss batching. What is it? Batching involves producing several artworks simultaneously, typically with a common theme or style. You may have encountered this concept before, but it's worth reiterating, especially as it aligns with taking your own reference photos. This approach not only grants you full control over your project but also aids in batching your work if you capture multiple photos of your subject from various angles. You can create a series of artworks to add to your portfolio. Begin with your reference photo/photos in different ways to craft multiple compositions. Don't hesitate to remove elements from the photo or incorporate new ones into the composition. Don't worry that batching will make you feel like a production line or that creating a themed series will restrict your connections with others. Practicing batching can inspire you to delve deeper into your work and potentially elevate your art practice to new levels.

There are several tips to make batching smoother and quicker. One is to use a consistent color palette. You might have different hats in each painting, but the colors remain the same across all. Once your color palette is set, apply the color on your brush to all paintings before switching to the next color, repeating this process with all your colors. Before you know it, you've completed an entire series of paintings. I begin by selecting all the canvases I will use, then sketching on each one before moving to the underpainting layer. Once this is done, I proceed to paint batching. When all the paintings are finished and dry, they can be sealed simultaneously. Consider batching an opportunity to create more art, hone your skills, and elevate your work. While it may not suit everyone, for small business owners, it could be crucial for effective time management. Think of it as a way to boost productivity without becoming a mass production machine.
What I'm working on
As I get older, time seems to fly by faster, which is the opposite of what I expected. Aging involves letting go of many things. I've retired, kept friendships with those who truly bring me joy, and downsized from a large house to a small cottage to simplify cleaning. With March approaching, I'm looking forward to spring and even the hot weather, as I've had enough of the cold. Weather forecasts predict a few more weeks of chilly, windy weather. I'm also practicing what I preach. Last year, I spent time learning all the features of my iPhone's camera, and I'm still learning as I prepare to upgrade. The new phone's camera offers additional features to explore. Since many of us share photos on social media and websites like Etsy, capturing the best images is essential to attract attention. During my morning walks around town, I've taken

numerous photos. The town has homes from the 1800s to the 1940s, with some from the 70s and 80s, creating an eclectic mix. A new housing development on the town's northern edge is likely to alter its dynamics. This town has long been home to generations of the same families, but Austin's growth is prompting people to seek homes outside the city, leading to new constructions. This change will provide more photography opportunities. I now have a vast photo collection, though I haven't painted any yet, as I'm more inclined to photograph buildings rather than paint them. I'm also following my advice by batching my work, focusing on a floral collection, a familiar subject that helps me progress towards a series of paintings. Having written a monthly blog for over a year, I explore various art topics and small business strategies. I'm now experimenting with some areas I've previously overlooked, which I will feature in future blogs. To produce consistently, I've realized the need for a structured system for both painting and business to stay organized and avoid feeling overwhelmed. Everyone's approach is different; you must find what works for you to avoid feeling stuck. If you have any time-saving tips, please share them so I can pass them on to others.
New on my website
One of my priorities is to keep improving my website. For me, this means making it appealing to you. I'll be adding some new artwork next month that I'm presently working on and for now
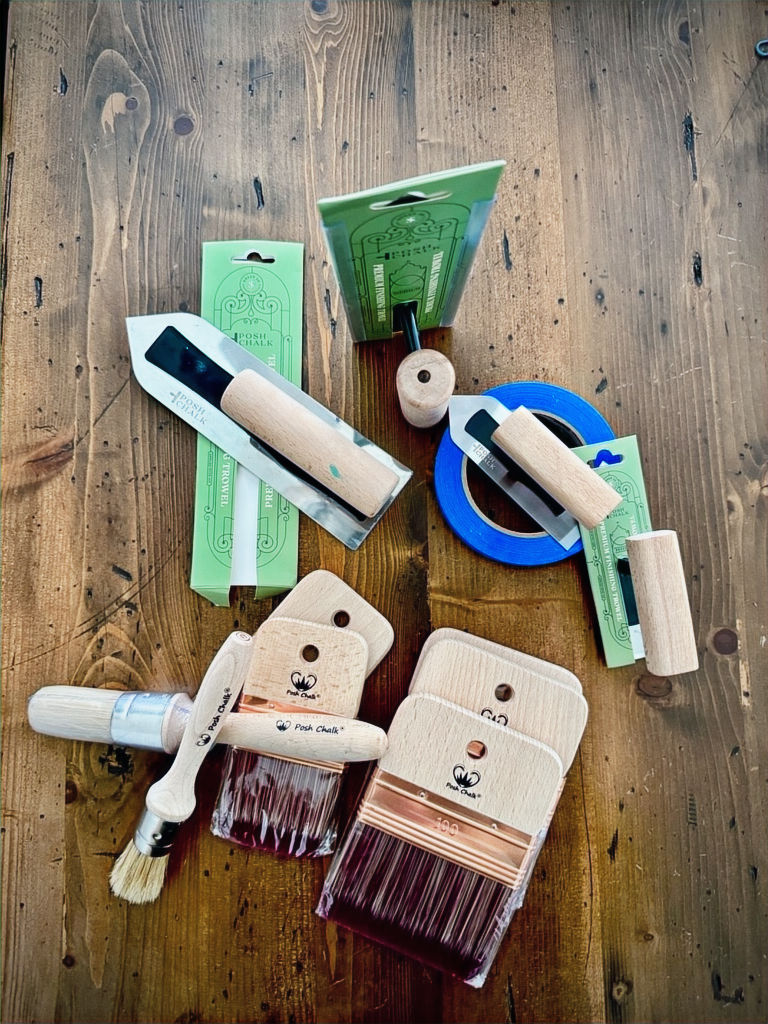
I've added some brushes and tools from Woodubend's Posh Chalk product line. I have been using these products and love them. They're well made and all the handles are wood. Loo for them as you explore my website.
Inspirational Quote


Comments